Terrain Generator
It is necessary to create a terrain to a game. In Unity, it is easy to create a terrain by the built-in editor. It is recommended to import a terrain asset package if there is no texture for the terrain.
Create a Terrain
- You can create a terrain by clicking
GameObject,3D objectandTerrainon the toolbar. - You can change the attributes of the terrain, e.g. width, height, etc., on the
inspectorview.
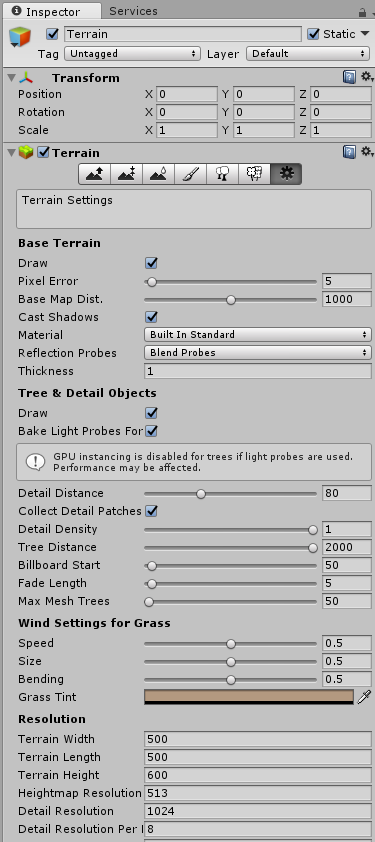
- There are 7 basic options to edit the terrain.

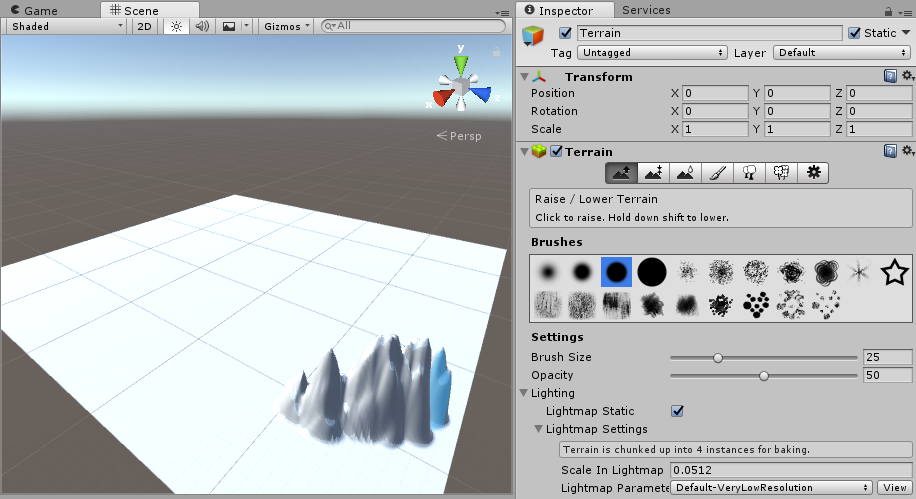
Raise / Lower Terrain
- Choose the option
Raise / Lower Terrain, select the one brush, and start to draw on the terrain (raise the terrain). - If you draw with Shift key, it would lower the terrain.
Paint Height
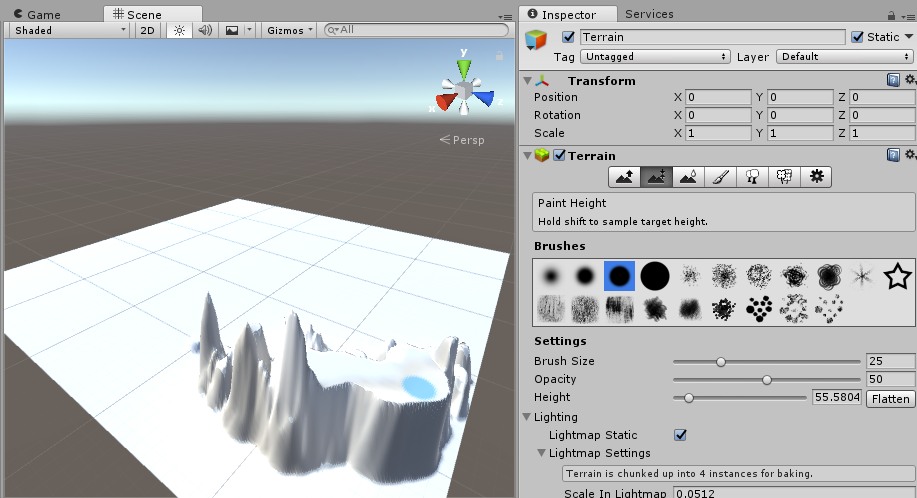
- Choose the option
Paint Height, select the one brush, and start to draw on the terrain. - The difference between
Raise / Lower TerrainandPaint Heightis the second one would limit the raising height. You can set the height limitation on theSettings.
Smooth Height
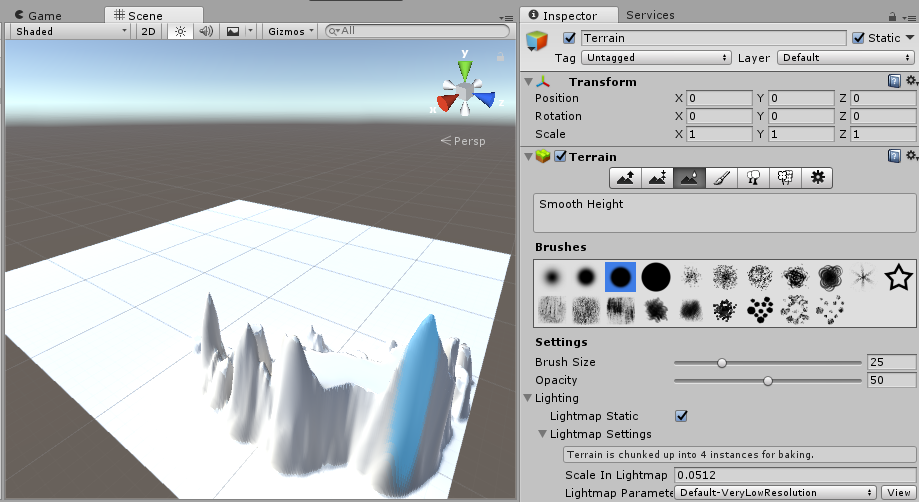
- Choose the option
Smooth Height, select the one brush, and start to draw on the terrain. It would smooth the convex of the terrain.
Paint Texture
- [Optional] Download and import the terrain asset package if there is no texture for terrain. (Here, we use
Nature Volumn 1as the example.) - Choose the option
Paint Texture. - Add the texture on
Texturesby clickingEdit Textures, select a type of textures with its normal type, and clickAdd.
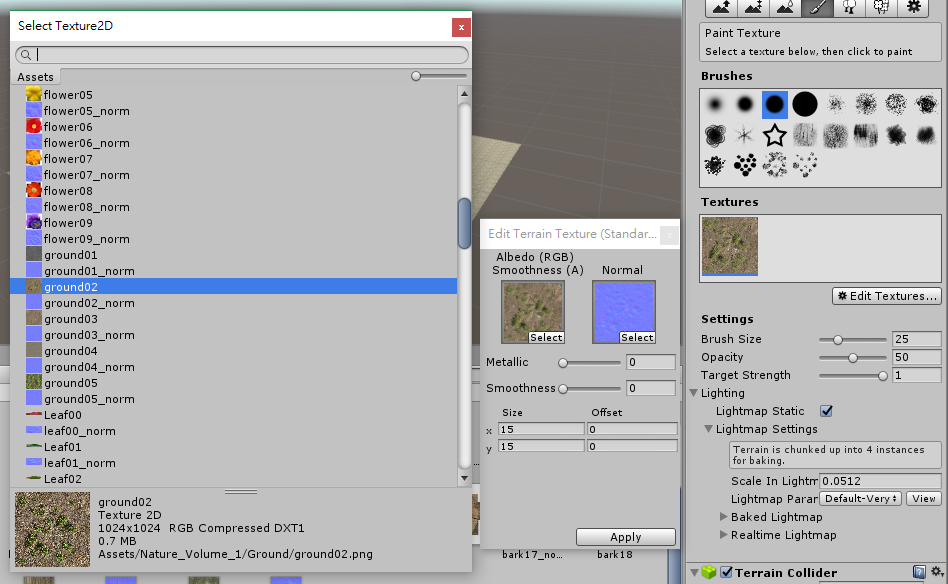
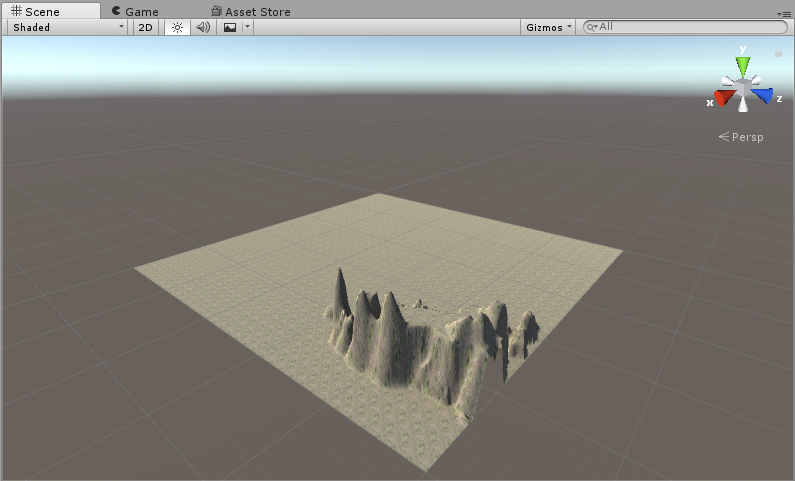
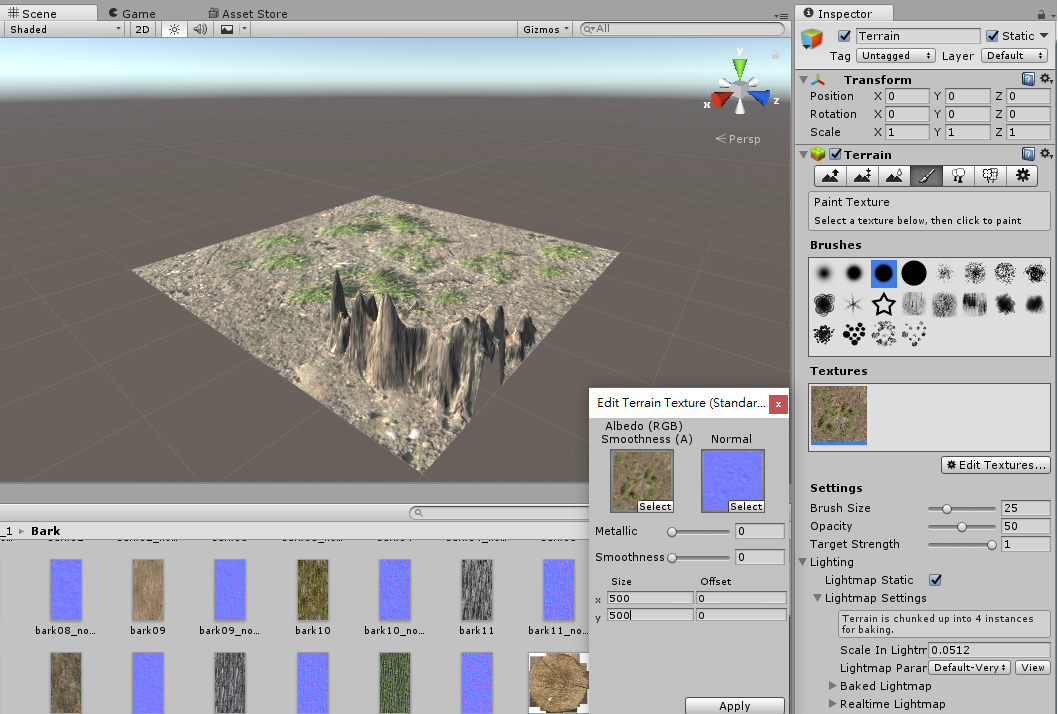
- You can view the textured terrain. It looks like to paste a image on the terrain repeatedly. You could simply change the tile size (x = 15 and y = 15 by default) to scale the image size to be pasted to the terrain.
Place Trees
- [Optional] Download and import the tree asset package (Here, we use
Nature Starter Kit 2as the example.) - Choose the option
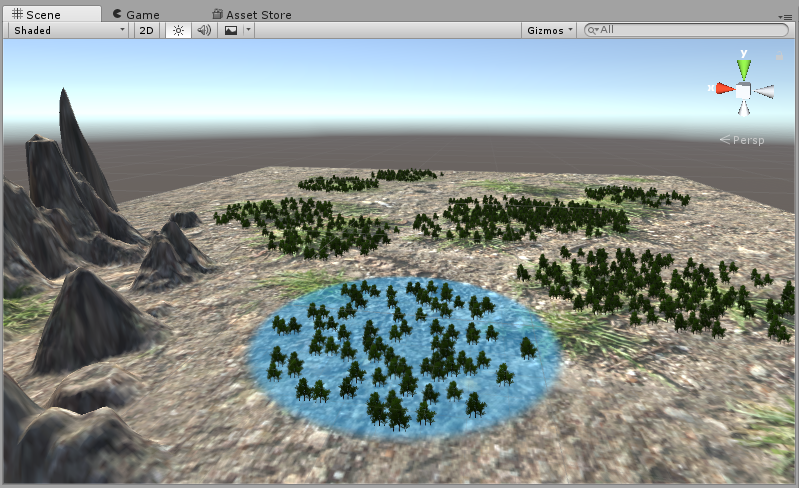
Place Trees, and preapre a tree by clickingEdit Trees,Add Tree,Tree Prefab.
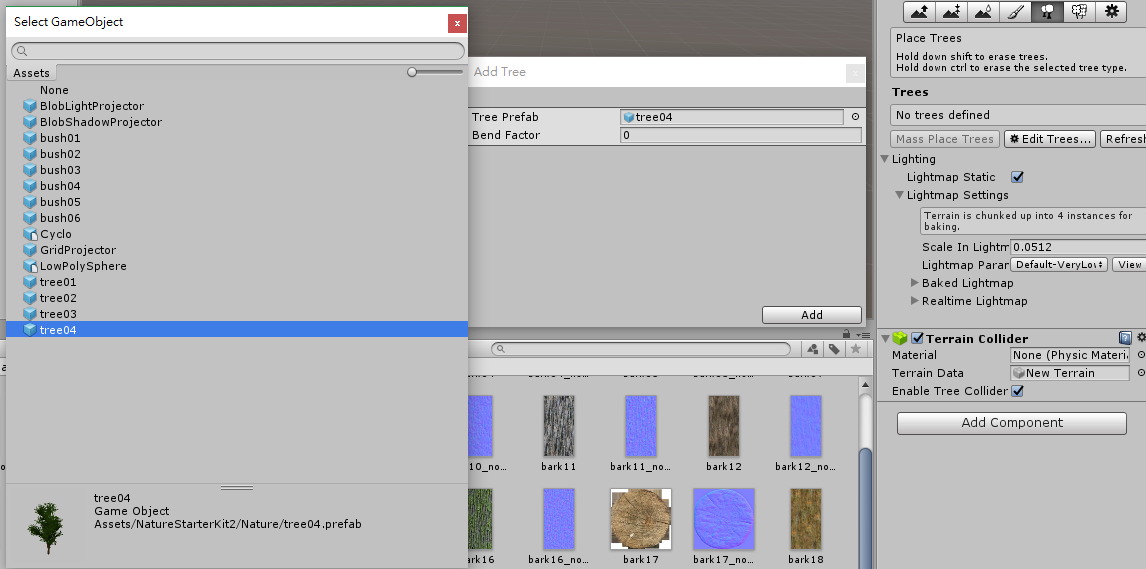
- Drag the tree prefab from
Inspectorview into the scene. You can also add trees to where you want to place by clicking.
Paint Details
- [Optional] Download and import the asset package (Here, we use
Nature Starter Kit 2as the example.)
- You can also add others details into the scene, for example, bushes, rocks, etc.
- The procedure to import the asset package is similar with the previous
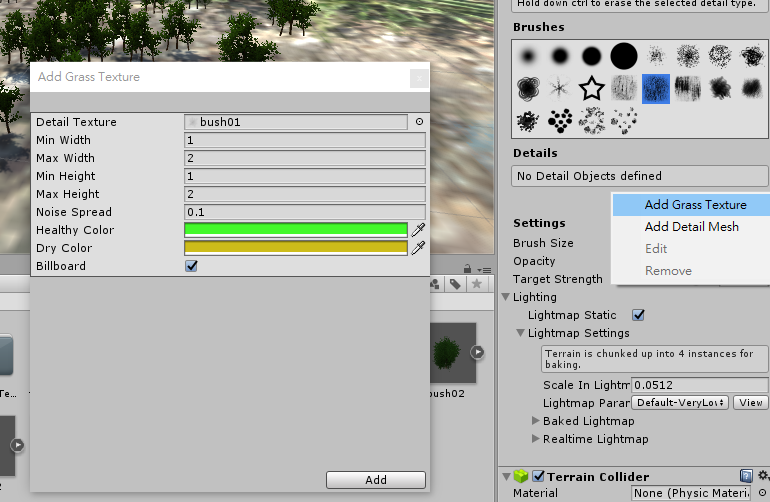
Place Trees. ChoosePaint Details, clickEdit Details, andAdd Grass TextureorAdd Detail Mesh.
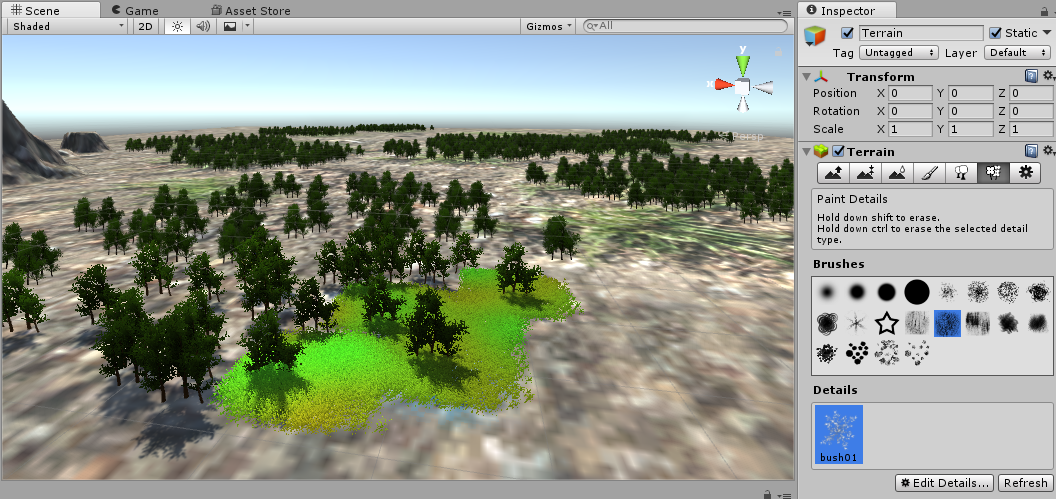
- Choose the desired brush, and draw it on the desired place.
Terrain Settings
- Choose
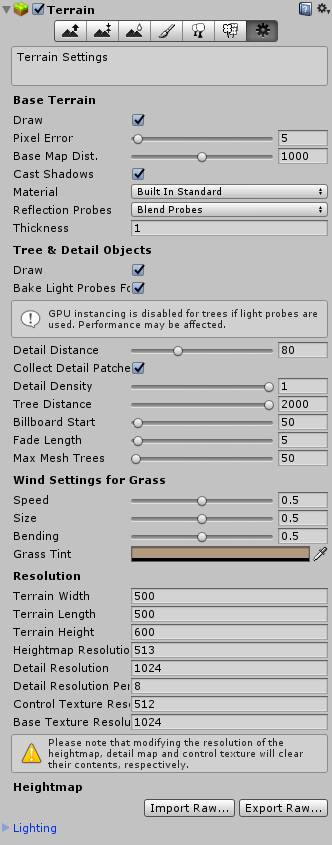
Terrain Settings, there are several basic environment configurations.
- Base Terrain
Pixel Error: The error for showing the 3D object on the view. It represents LOD (Level of Development / Level of Detail). While the value is more higher, the object pixel is shown in more detailed.Base Map Dist: The distance is set for higher resolution zone.Cast Shadows: It is the flag for controling the shadow from the light projection.
- Wind Settings
Speed: wind speedSize: the area affetced by the windBending: the angle changed by the windGrass Tint: the color tint setting for the grass and the grid
- Resolution : the configuration for width, length, height of the terrain and it related resolutions