Secure Nginx with Let's Encrypt on Ubuntu 14.04
Requirement
- Ubuntu 14.04 with non-root user who has sudo privileges
- own or control the registered domain name
- (lowest) A Record points your domain to the public IP address of the server
Step.0 : install
- install necessary python packages
# install packages
$ pip install pyopenssl ndg-httpsclient pyasn1

# upgrade packages
$ pip install pyopenssl ndg-httpsclient pyasn1 --upgrade
| Note |
|---|
| if warning messages are "snimissingwarning or insecureplatformwarning" on the process of obtaining the certificate, it would need the above install |
Step.1 : install Let's Encrypt Client
- install Git and bc
# get latest package information
$ sudo apt-get update

# update the server's package
$ sudo apt-get -s upgrade

# install necessary git and bc packages
$ sudo apt-get -y install git bc
- install letsencrypt from github to local /opt/letsencrypt
$ sudo git clone https://github.com/letsencrypt/letsencrypt /opt/letsencrypt
Step.2 : Obtain a Certificate
- Here, we demonstrate using Webroot plugin to obtain an SSL certificate.
- The Webroot plugin works by placing a specific file in the directory /.well-known
$ sudo mkdir /.well-known
- Install nginx (skip if it is already installed)
$ sudo apt-get install nginx
- Set configuration of nginx server
# edit nginx default configuration
$ sudo vim /etc/nginx/sites-available/default
# add the access directory to the block server (inside server block)
location ~ /.well-known {
        allow all;
}
# the default document root for using Webroot plugin
/usr/share/nginx/html
- Reload Nginx Service
$ sudo service nginx reload
- Create a SSL Certificate
- specify our domain name with -d option
- if you want a single cert to work with multiple domain names (e.g. example.com or www.example.com, etc.), be sure to include all of them.
# the exmaple command is the following
# notice --webroot-path is the path for saving .well-known/acme-challenge information
# also, the path is also for auto-renewal
./letsencrypt-auto certonly -a webroot --webroot-path=<file_path> -d example.com -d www.example.com
- the following is the example using example.no-ip.biz
cd /opt/letsencrypt
./letsencrypt-auto certonly -a webroot --webroot-path=/usr/share/nginx/html -d example.no-ip.biz
| 註解 |
|---|
| If there is error, the log would be /var/log/letsencrypt/ . If the message is " let's encrypt policy forbids issuing for name ", it means the domain name is not allowed for let's encrypt, e.g. cloudnapp.net, Amazon EC2, etc. |
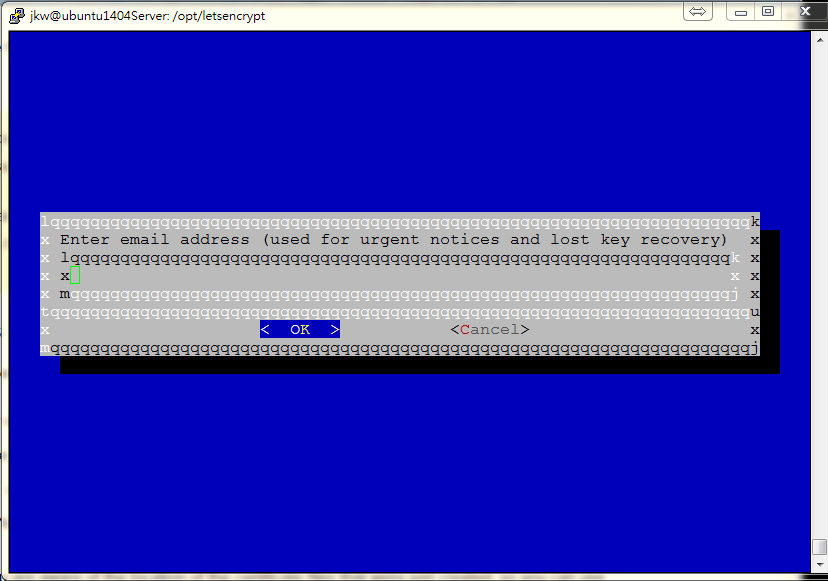
Let's encrypt takes E-mail as a part of Certificate
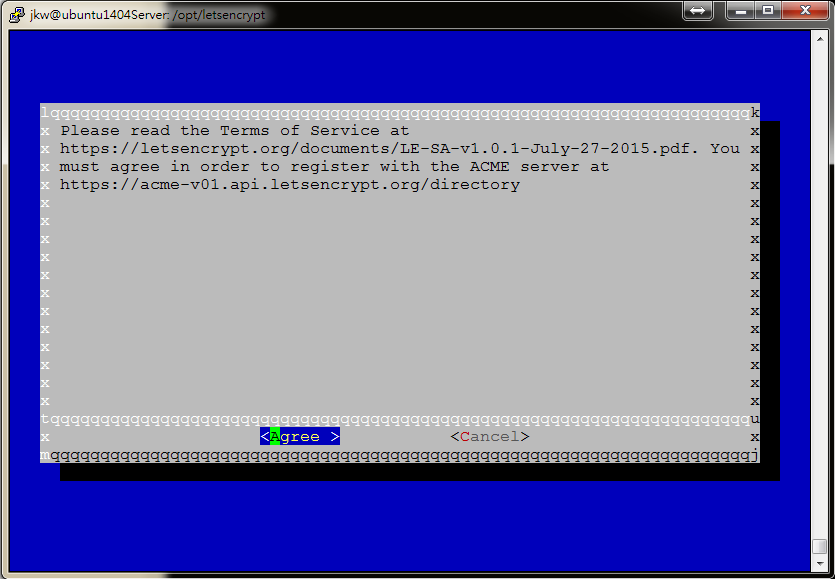
Also, the term of service is the following :
- after Let's encrypt initialization and if it is successfully generated, notes would be like bellow
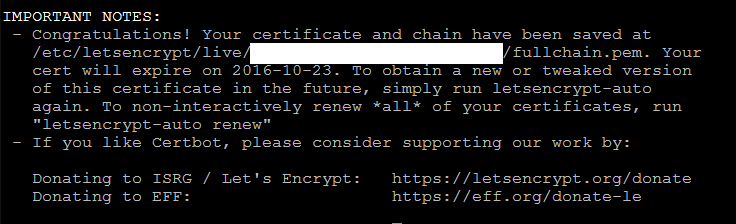
- The Certificate files are also generated
# the default path for certificate files
cd /etc/letsencrypt/live/example.no-ip.biz/
# cert.pem : the domain's certificate
cert.pem -> ../../archive/example.no-ip.biz/cert1.pem

# chain.pem : the let's encrypt chain certificate
chain.pem -> ../../archive/example.no-ip.biz/chain1.pem

# fullchain.pem : combine both cert.pem and chain.pem
fullchain.pem -> ../../archive/example.no-ip.biz/fullchain1.pem

# privkey.pem : the certificate's private key
privkey.pem -> ../../archive/example.no-ip.biz/privkey1.pem
| 註解 |
|---|
| The certificate files would be truely located on /etc/letsencrypt/archive , but the Let's encrypt create symbolic links to the most recent certifcate files in the directory /etc/letsencrypt/live/domain_name |
In most conditions, you will configure your server to use fullchain.pem as the certificate file, and privkey.pem as the certificate key file.
Generate Strong Diffie-Hellman Group (2048-bit)
$ sudo openssl dhparam -out /etc/ssl/certs/dhparam.pem 2048
Step.3 : Configure TLS/SSL on Web Server (Nginx)
- Edit nginx configure file
$ sudo vim /etc/nginx/sites-available/default
- comment or delete the following settings inside the server block because ssl usually takes port 443
       # listen 80 default_server;
       # listen [::]:80 default_server ipv6only=on;
- start to configure ssl on port 443 inside the server block
        listen 443 ssl;

        server_name example.com www.example.com;

        ssl_certificate /etc/letsencrypt/live/example.no-ip.biz/fullchain.pem;
        ssl_certificate_key /etc/letsencrypt/live/example.no-ip.biz/privkey.pem;
- additionally, secure ssl protocols and ciphers to use Diffie-Hellman group generated, add the following settings to the server block
        ssl_protocols TLSv1 TLSv1.1 TLSv1.2;
        ssl_prefer_server_ciphers on;
        ssl_dhparam /etc/ssl/certs/dhparam.pem;
        ssl_ciphers 'ECDHE-RSA-AES128-GCM-SHA256:ECDHE-ECDSA-AES128-GCM-SHA256:ECDHE-RSA-AES256-GCM-SHA384:ECDHE-ECDSA-AES256-GCM-SHA384:DHE-RSA-AES128-GCM-SHA256:DHE-DSS-AES128-GCM-SHA256:kEDH+AESGCM:ECDHE-RSA-AES128-SHA256:ECDHE-ECDSA-AES128-SHA256:ECDHE-RSA-AES128-SHA:ECDHE-ECDSA-AES128-SHA:ECDHE-RSA-AES256-SHA384:ECDHE-ECDSA-AES256-SHA384:ECDHE-RSA-AES256-SHA:ECDHE-ECDSA-AES256-SHA:DHE-RSA-AES128-SHA256:DHE-RSA-AES128-SHA:DHE-DSS-AES128-SHA256:DHE-RSA-AES256-SHA256:DHE-DSS-AES256-SHA:DHE-RSA-AES256-SHA:AES128-GCM-SHA256:AES256-GCM-SHA384:AES128-SHA256:AES256-SHA256:AES128-SHA:AES256-SHA:AES:CAMELLIA:DES-CBC3-SHA:!aNULL:!eNULL:!EXPORT:!DES:!RC4:!MD5:!PSK:!aECDH:!EDH-DSS-DES-CBC3-SHA:!EDH-RSA-DES-CBC3-SHA:!KRB5-DES-CBC3-SHA';
        ssl_session_timeout 1d;
        ssl_session_cache shared:SSL:50m;
        ssl_stapling on;
        ssl_stapling_verify on;
        add_header Strict-Transport-Security max-age=15768000;
- finally redirect port 80 to port 443 to force using https, add the following settings outside the original server block
server {
    listen 80;
    server_name example.no-ip.biz;
    return 301 https://$host$request_uri;
}
- reload Nginx service
$ sudo service nginx reload
- Also, you can use third-party online software to check TLS/SSL certificate
https://www.ssllabs.com/ssltest/analyze.html?d=example.no-ip.biz
Step.4 : Setup Auto Renewal
Let's encrypt certificates are vaild for 90 days, but it is strongly recommended that renew the server certificates for 60 days to allow a margin of error.
It is simply to renew the Let's encrypt
$ /opt/letsencrypt/letsencrypt-auto renew
| 註解 |
|---|
| If renew the server certificate with multiple domain names, only the base domain would be renewal. |
- Use crontab to schedule the renewal process per two months
$ sudo crontab -e

# crontab entry
0 0     1 */2 * /opt/letsencrypt/letsencrypt-auto renew >> /var/log/lerenew.log
0 0     1 */2 */etc/init.d/nginx reload
or the following method
$ sudo vim /etc/crontab

# crontab entry
0 0     1 */2 *   root    /opt/letsencrypt/letsencrypt-auto renew >> /var/log/lerenew.log
0 0     1 */2 *   root    /etc/init.d/nginx reload
Step.5 Update the Let's Encrypt Client
$ cd /opt/letsencrypt
$ sudo git pull